Arduino Hx711 Weight Scale Interface 1 0 Software
Spavner dlya variant omega 2. I found a dead scale at work, the electronics were fried. I figured the load cell inside was still good, and would be fun to hack. I stripped out the load cell, and connected it to an Arduino with a HX711 amplifier /. Arduino Weight Measurement Project with Load Cell and HX711 Module Interfacing: Circuit Diagram and Code. Arduino Projects Software Scale. DIYmall 1KG Scale.
Nowadays, if you want to build your own digital weight scale, it’s surprisingly easy because you only need a handful of commonly available components in addition to your favorite Arduino board. In this primer I’m going to describe how to interface one inexpensive Load Cell to an Arduino Uno with the help of the popular HX711 module so that you can rig up a complete digital weight scale later.
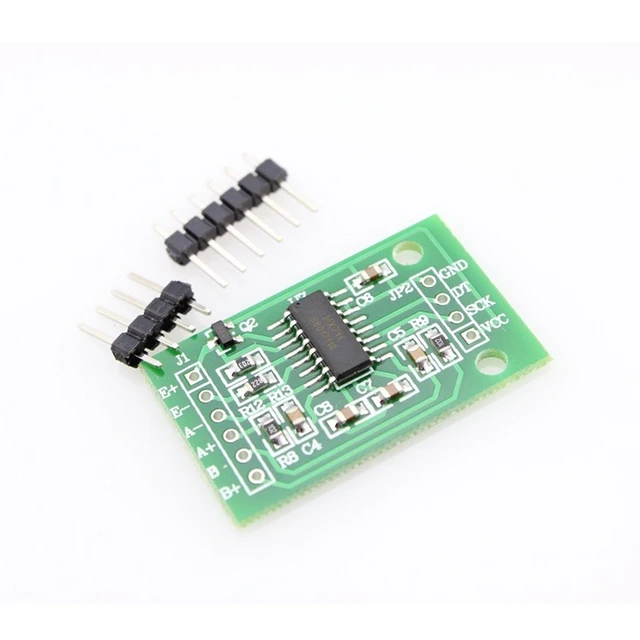
Hardware Required • Arduino Uno • 50kg Half-Bridge Load Cell • HX711 (Weight Sensor Amplifier + 24 bit ADC) module The 50kg Half-Bridge Load Cell (sometimes called a strain gauge) consists of a metallic half-bridge connected to three wires of different colors (red, white, and black). When pressure is exerted on the half-bridge, it sends the corresponding signal via the red wire. This particular load cell can measure weights up to about 50kg. Once you’re sure about the functionality of your experimental setup, you can adjust the scale factor with a known weight until you get correct readings (the weight/load needs to be applied to the tip in the middle of the sensor for accuracy). Literally, the example code has auto & manual calibration features i.e. Initially auto calibration will run and thereafter you can tweak the values through manual calibration.
The given example code lets you to add (+/a) and subtract (-/z) calibration factor value (it’d be better to follow the steps in the code for scale calibration). Remember, this article is just a primer that only shows you how to connect a load cell to Arduino with the help of an interface circuitry (perhaps, the fastest method to hook everything together and see if it would work and use serial monitor for readout). So, you must start your own research to complete your digital weight scale concept/project. Also note that, load cells comes in various form factors/specifications, and their wire color codes could be dissimilar than the one mentioned here. Actually, I began working with another (TEM01052B) 50kg half-bridge ‘bathroom scale’ load cell (with one home-made support holder) because a consignment was delayed by the Xmas bang! What’s a Load Cell?
In principle, load cell (made by using an elastic member with very highly repeatable deflection pattern to which a number of strain gauges are attached) is usually an electro-mechanical a sensor/transducer that converts a load/force acting on it into an electronic signal. Although there are many different kinds of load cells, resistive load cells (and capacitive load cells) are the most popular ‘common’ types widely available now. In a resistive type load cell, if a load/force/stress is applied to it, there’s a change in its resistance, and this change leads to a change in output voltage when a input voltage is applied. “Single Point Load Cells” are broadly used to build scales as they offer excellent off-center loading compensation, but “Button Load Cells” are compact and easy to use and ideal for measuring compression forces that are applied axially. Since the mV range output from a load cell is not large enough to be processed accurately, one needs to amplify the signal carefully to obtain a utile output. And, the interface usually has a 24-bit ADC in addition to the required regulator and amplifier circuitry (reference – ).
Finally, a bunch of images for your reference.